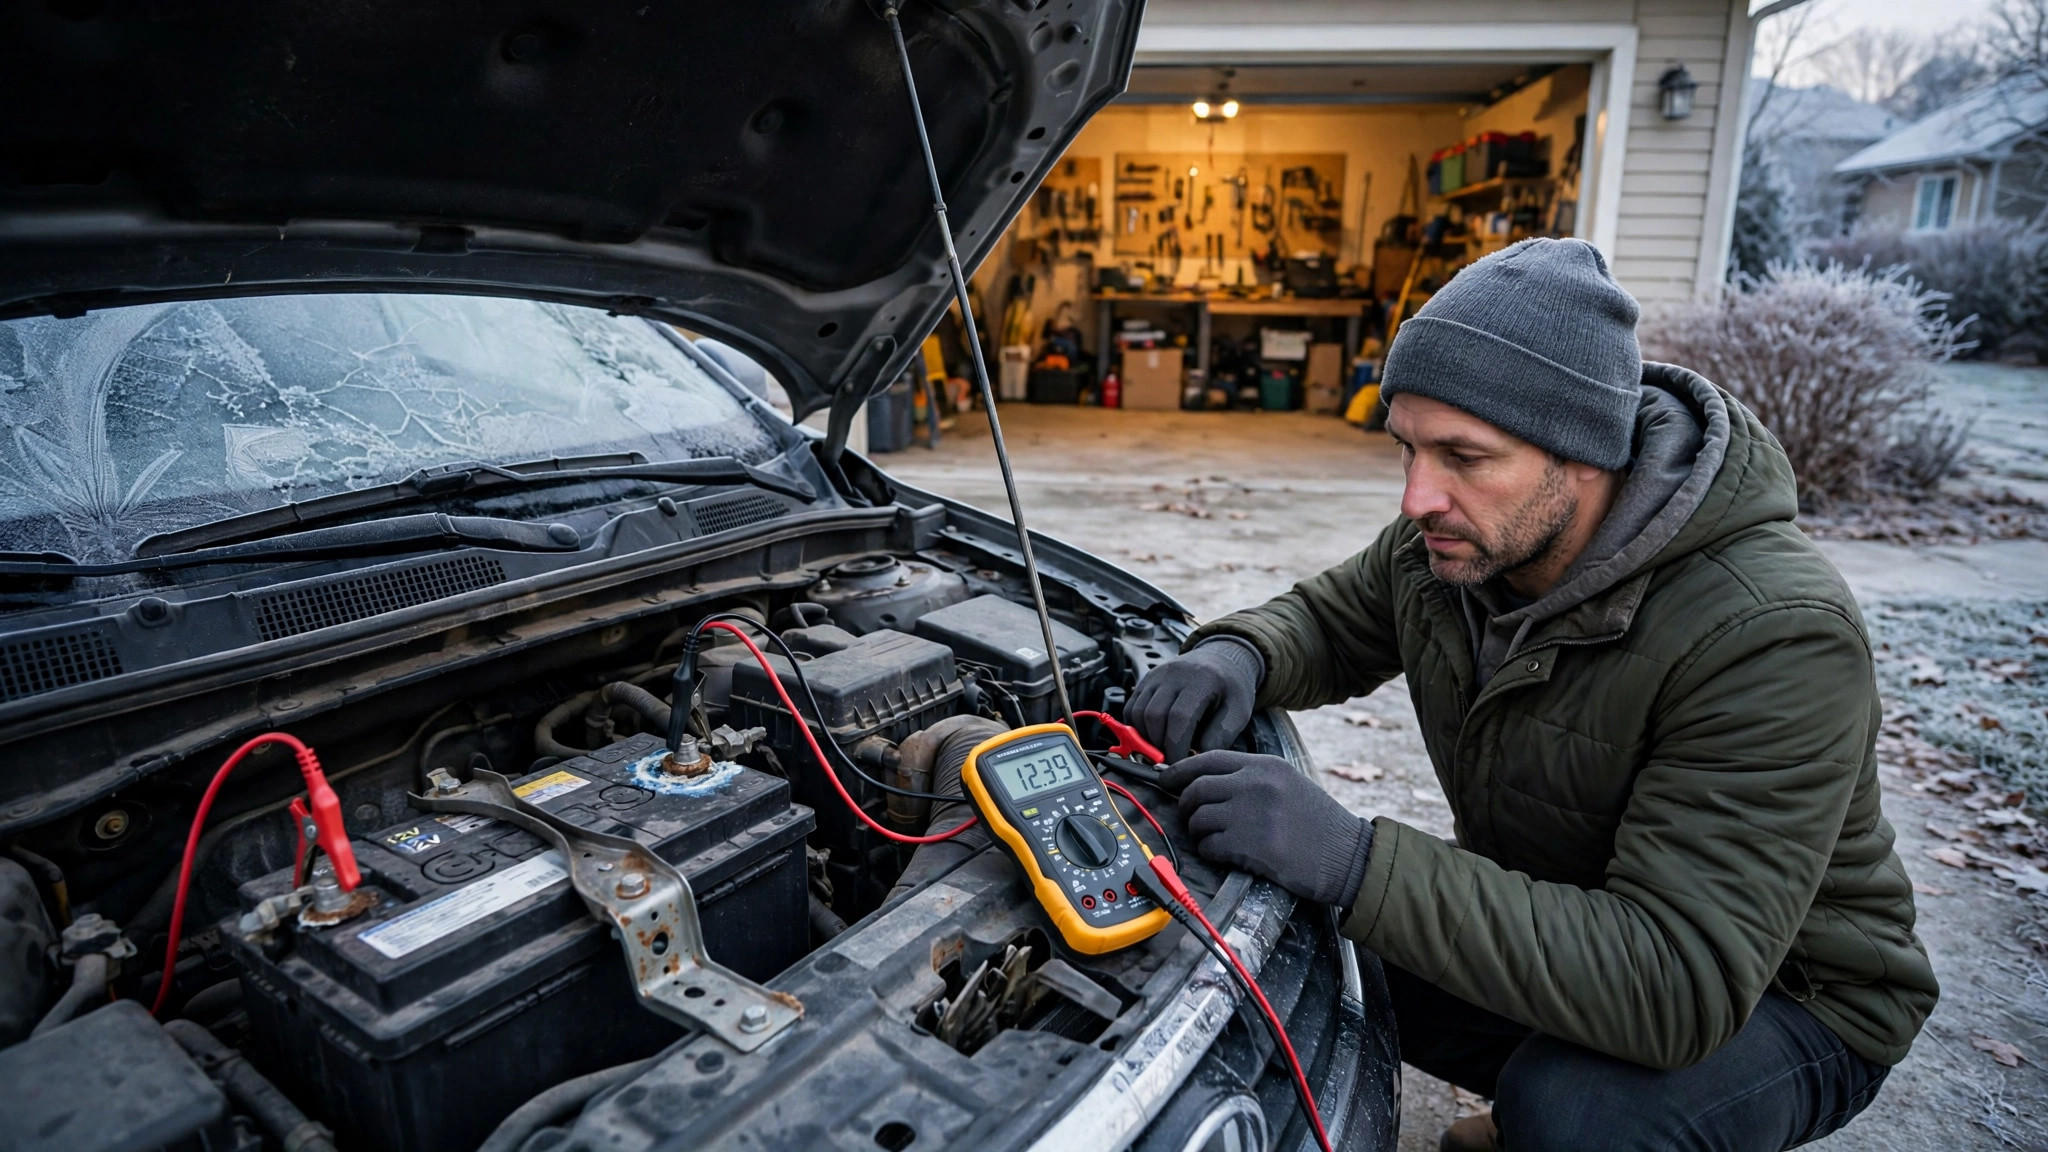
Testing and Replacing a Dead 12V Car Battery in Your Driveway
By DealShore Motors
Click. Click-click-click. Then nothing. That sound costs Americans a tow, a missed shift, and a $250–$400 parts-store bill they often did not need to pay in full — because a “dead battery” is frequently not dead at all. Sometimes it is a battery that is merely discharged, a corroded terminal adding resistance, or an alternator that stopped charging weeks ago and quietly ate a good battery alive. Replacing the battery without testing first is how you buy a new battery, install it, and get the exact same click three mornings later. This guide separates the three suspects — battery, terminals, charging system — in about five minutes, then walks you through the swap if the battery really is finished.
A 12V battery (the low-voltage battery in every gas, diesel, hybrid, and electric car) stores chemical energy and delivers a huge burst of current to the starter motor, the electric motor that spins the engine to life. A multimeter is a handheld meter that measures voltage (electrical pressure). CCA (cold cranking amps) is the battery’s rated starting power at 0°F (−18°C) — bigger numbers crank bigger engines in colder weather. AGM (absorbed glass mat) is a sealed battery type used by many modern and start-stop cars; it often costs more and, on some cars, must be “registered” to the computer after replacement. Plain language from here on — every term gets defined where it first appears.
The 30-Second Version
- Park, engine and everything electrical OFF. Pop the hood and look first: swollen case, cracked case, or heavy white/green corrosion means stop guessing — plan on replacement.
- Set a multimeter to DC volts (the “20V” range on a manual meter). Red lead on the positive (+) terminal, black lead on the negative (−).
- Read it after the car has sat at least an hour: 12.6V = fully charged, 12.4V = about 75%, 12.2V = about 50%, 12.0V or lower = discharged or failing.
- Have a helper turn the key to start while you watch: voltage that crashes below about 9.6V during cranking means the battery cannot deliver under load — replace it.
- If it starts, read again with the engine running: about 13.8–14.7V = the alternator is charging. Around 12.6V or less with the engine running means the charging system — not the battery — is your real problem.
- Only then swap: negative cable OFF first, positive cable OFF second, hold-down out, old battery straight up and out. New battery in, hold-down snug, positive ON first, negative ON last.
Tools needed: digital multimeter; combination wrench or socket set for the terminal clamps and hold-down; battery terminal brush or wire brush; baking soda and an old cup of water for corrosion (optional); gloves and eye protection; a battery carrier strap if you have one — most car batteries weigh 40–60 lb (18–27 kg).
Socket sizes: terminal clamps are most often 10 mm (very common on Japanese cars and many others); hold-downs are commonly 10 mm, 12 mm, or 13 mm, and some GM/Ford hold-down bolts take 13 mm or a long extension with 13 mm. Some side-terminal GM batteries use 5/16-inch (8 mm). Bring the set, not one socket.
Estimated time: 5–10 minutes to test; 20–40 minutes to replace the first time.
Difficulty: 🔧🔧 out of 5 wrenches — easy job, unforgiving order of operations.
Before You Touch Anything: The Safety Warnings Come First
⚠️ Warning 1 — order is everything. When removing cables, always take the negative (−) cable off FIRST and put it ON LAST. Why: if your wrench touches the car’s metal body while loosening the positive terminal with the negative still connected, you short the battery through the wrench — sparks, a welded wrench, burns, or a damaged computer. With the negative already off, that same slip does nothing.
⚠️ Warning 2 — acid and gas. A lead-acid battery contains sulfuric acid and vents hydrogen gas. No smoking, no sparks near the top of the battery, wear eye protection, and if you get acid on skin, flush with lots of water. A case that is swollen, bulging, hissing, or smells strongly of rotten eggs is a failed battery — do not jump it, do not charge it fast, replace it and keep your face away from it.
⚠️ Warning 3 — weight and electronics. Batteries are dense and awkward; lift with your legs and get help rather than herniating yourself over a fender. On newer cars, expect to reset the clock, radio presets, and power-window “auto” function after disconnecting power; some models (notably many BMW, VW/Audi, Mini, and start-stop cars) also require battery registration with a scan tool so the charging system treats the new battery correctly — skip it and the car can overcharge and shorten the new battery’s life. Your manual says whether yours needs it.
No jack is needed for this job — you are working from above. The driveway discipline in our jack-stand safety guide and our $250 starter tool kit guide is still the foundation for every bigger job in this series.
Step 1 — Look Before You Measure (2 Minutes)
Open the hood and find the battery. On some cars it hides under a plastic cover; on others (some Chrysler, BMW, and GM models) it lives in the trunk or under a seat — the testing and removal order is the same. Look for:
- A date sticker on top or the side (for example “11/23” means November 2023). As of 2026, a battery dated 2021 or earlier is living on borrowed time in a hot climate, and 2022–2023 is borrowed time in a cold one.
- Corrosion — white, blue, or green crust on the terminals. Corrosion adds electrical resistance; a good battery behind bad corrosion cranks exactly like a dead one.
- A loose clamp. Wiggle each terminal clamp by hand. If it rotates on the post, that alone can cause a no-start.
- Damage — cracks, leaks, a lifted or bulging top. Any of these ends the test: replace it.
Brutal honesty: parts stores will happily sell you a battery for a car whose only fault was a loose 10 mm clamp nut. Look first. It is free.
Step 2 — The Resting Voltage Test (The 5-Minute Truth)
Voltage is state of charge, not a full health verdict — but it is the best first filter, and it is honest if you do it right.
- Car off, key out, doors closed, lights off. For the cleanest reading, the car should have sat at least an hour after driving or charging. A battery tested seconds after shutdown shows inflated “surface charge.”
- If you just drove it, burn off surface charge: turn the headlights on (engine off) for about 2 minutes, turn them off, wait a minute, then test.
- Set the multimeter to DC volts. Red lead to positive (+, usually red cover, larger post), black lead to negative (−).
- Read the number and use this table (approximate, at about 77°F / 25°C, for a standard flooded lead-acid battery; AGM resting voltage runs slightly higher):
| Resting voltage | State of charge | What it means |
|---|---|---|
| 12.6–12.8V | ~100% | Fully charged — if it still won’t crank, look at terminals, starter, or a load failure |
| 12.4V | ~75% | Usable, but charge it and retest |
| 12.2V | ~50% | Half discharged — a healthy battery should not sit this low on its own |
| 12.0V | ~25% | Discharged or failing; repeated time here damages lead-acid batteries |
| Below 11.9V | ~0% / possible bad cell | Charge slowly and load-test, or replace if it won’t hold voltage overnight |
Why it matters in October: AAA’s long-standing winter warning is that a battery loses about 35% of its strength at 32°F and up to about 50% near 0°F, while the engine needs more power to crank through thick oil. A battery that reads 12.2V on a mild autumn day is the one that gives you the click in January.
Step 3 — The Cranking and Charging Tests (Don’t Skip These)
Cranking test. Keep the meter connected and have a helper crank the engine for a few seconds while you watch the lowest number. Healthy: it dips, but stays at or above roughly 9.6V in mild weather. Below that while cranking, the battery is failing under load even if its resting voltage looked fine. No helper? Many inexpensive meters have a MIN/max record button — use it.
Charging test. With the engine running and idling, read again. Roughly 13.8–14.7V means the alternator (the engine-driven generator that recharges the battery) is doing its job. Reading near resting voltage with the engine running means the car is running off the battery — find the charging fault (alternator, belt, connections) before you blame any battery, new or old. Reading persistently above about 15V suggests overcharging, which cooks batteries.
What Owners Say (paraphrased from r/MechanicAdvice and r/askcarsales threads): the recurring no-start stories are rarely “the battery just died for no reason.” They are: the replacement battery that “died in a year” because the alternator was undercharging all along; the no-start cured by tightening a finger-loose clamp; and the battery killed young by short trips that never repaid the start. Test all three systems, not just the easiest one to buy.
Step 4 — Decide: Charge, Clean, or Replace?
- 12.4V or higher + passes cranking: battery is probably fine. Clean and tighten the terminals, fully charge it, and hunt the real fault (starter draw, parasitic drain — a circuit that stays awake and drains the battery overnight).
- Low voltage, but it takes a slow charge and then passes cranking and holds 12.6V overnight: it was discharged, not dead. Find why it discharged (lights left on, short trips, parasitic drain) or you will be back here.
- Won’t hold charge overnight, fails cranking below ~9.6V, is swollen/damaged, or is old and tests weak twice: replace it. Do not keep jump-starting a failing battery — each deep discharge and jump cycle stresses the alternator too.
Buying the replacement — match four things: (1) Group size — the physical size and terminal layout stamped on the old battery (for example 24F, H6/48, 35); (2) CCA rating — meet or exceed the old battery’s rating, especially in cold states; (3) Type — if the car came with AGM or is a start-stop model, replace AGM with AGM; putting a cheaper flooded battery where the car expects AGM is false economy; (4) Date — buy the freshest sticker on the shelf, ideally within the last few months. Typical US prices as of October 2026: roughly $120–$250 for a standard flooded battery and $200–$350+ for AGM, before a core charge (a refundable deposit, commonly about $15–$25, returned when you hand back the old battery). A shop or dealer install commonly adds labor, and registration-required cars add a scan-tool step — which is exactly why the driveway swap saves real money on cars that do not require registration.
Step 5 — Replace It: Numbered, In Order
Safety first, again: engine off, key out, eye protection on, no sparks or flames nearby. Take a photo of the cable routing and any small extra wires on the terminals before you disconnect anything — that photo is gold at reassembly.
- Identify + and −. Positive is marked +, often with a red cover; negative is marked −, often black. On most cars the negative cable goes to the engine/body ground.
- Loosen the negative clamp first (usually a 10 mm nut). Wiggle it off the post and tuck it aside where it cannot spring back onto the post. Wrap it in a rag if it wants to wander.
- Loosen and remove the positive clamp second. Set it aside without letting it touch metal.
- Remove the hold-down — the bracket or strap clamping the battery’s base or top (commonly 10–13 mm; some need a long extension down the side of the battery). Keep the bolt; losing it in the engine bay is a rite of passage you can skip.
- Lift the old battery straight up and out. Use the handle or carrier strap, keep it level (acid inside), and set it on cardboard or concrete — not on your good driveway pavers if it is leaking.
- Clean while it is empty. Scrub the cable clamps and the tray with a terminal brush / wire brush until the contact faces are bright metal. Heavy corrosion can be neutralized with baking soda dissolved in water — keep that solution out of the battery itself. A clamp so eaten it will not tighten needs replacement, not prayer.
- Set the new battery in, same orientation. Terminals must line up with the cables without stretching them. If + and − are reversed from the old battery, you bought the wrong group (the “F” in 24F literally denotes reversed terminals) — exchange it, do not force the cables.
- Fit the hold-down snug — firm enough that the battery cannot shift when you push it hard by hand, not so cranked-down that you crack the case. A battery that slides around vibrates itself to an early death.
- Positive clamp ON first. Push it fully down onto the post, then tighten (typically 10 mm). It should not rotate when you twist it firmly by hand.
- Negative clamp ON last. Expect a tiny spark on some cars as modules wake up — then tighten the same way. A big spark and a hot cable means stop: something is on or shorted.
- Protect the terminals with anti-corrosion felt rings or a thin smear of dielectric grease / petroleum jelly over the outside of the fitted clamps (grease between post and clamp before fitting can insulate — put the clamp on clean metal first, protect after).
- Start the car. Then re-run the charging test: about 13.8–14.7V running means you are done electrically. Reset clock/presets/windows as needed, and if your model requires battery registration, get it done with a capable scan tool promptly.
- Return the old battery for the core refund and recycling. Never bin a car battery — lead-acid batteries are among the most recycled products on earth, and stores take them free when you bought the replacement there.
Torque note: terminal clamp nuts need “snug, no rotation” — overtightening cracks soft lead posts and deforms clamps. If your manual gives a spec, follow it; typical terminal and hold-down specs are in the low single-digit Nm to about 10 Nm range — these are not lug nuts, do not lean on them.
Hybrids and EVs: The Same 12V Rules (and One Bright Line)
Hybrids and EVs still carry a 12V battery, and when it dies the car can be completely dead even with a full main battery — no start screen, no door unlock chirp, nothing. Testing and replacement follow this same guide, and the resting-voltage table still applies (some use AGM — match the type). The bright line: the big orange high-voltage cables and the main traction battery are never a DIY job. This article is only about the ordinary 12V battery. If the 12V battery is inside the cabin or trunk on a hybrid, vent tubes matter — reconnect any vent hose fitted to the old battery.
DealShore Picks: Test It, Charge It, Rescue It
This is a diagnostic topic, so here is the verdict up front: Best Overall — NOCO GENIUS10 smart charger/maintainer (it answers “discharged or dead?” by actually charging and maintaining correctly). Best Value — AstroAI digital multimeter (the $20 tool that prevents the $250 guess). Best Rescue — NOCO Boost GB70 jump starter (gets you home without another car — but it is a rescue, not a repair). Selections are research-backed from manufacturer specs and owner data, not first-hand testing; criteria: accuracy and safety protections, correct charging profiles for flooded/AGM, and price-to-performance.
| Pick | Job it does | Key specs | Price tier |
|---|---|---|---|
| AstroAI Digital Multimeter (AM33B) | Resting, cranking, and charging voltage tests | DC voltage measurement, battery test modes, backlit display | Budget |
| NOCO GENIUS10 | Smart charge + maintain, temperature-compensated | 10A, 6V/12V, flooded/AGM/lithium (LiFePO4) profiles, desulfation mode | Mid |
| NOCO Boost GB70 | Jump-start without a second car | 2,000A peak, maker-rated to 8.0L gas / 6.0L diesel, spark-proof + reverse-polarity protection | Premium |
Best Value first, because it decides everything else: AstroAI Digital Multimeter Tester — the meter used for every number in this guide.
Best Overall: NOCO GENIUS10 10A Smart Battery Charger and Maintainer — fully charge a discharged battery properly before you condemn it, and maintain a car that sits.
Best Rescue: NOCO Boost GB70 2,000A Jump Starter — for the morning the test has to wait until after work.
When you buy through our links, we may earn an affiliate commission at no extra cost to you.
The Bottom Line
Test resting voltage (12.6V is full), test cranking (stay above ~9.6V), test charging (13.8–14.7V running) — in that order, before you buy anything. If the battery truly failed, the swap itself is negative-off-first, negative-on-last, hold-down snug, freshest date and correct group size and CCA. Do it in your driveway in under an hour, return the core, and you have saved the tow and the labor — and, more importantly, you know the alternator was not the killer. That knowledge is the whole job.
Previous in the DIY series: replacing wiper blades without cracking your windshield. Next: checking and topping off all five critical engine fluids without overfilling. New guides every week from DealShore Motors.
Sources
- Cold-weather capacity loss (about 35% at 32°F, up to about 50% near 0°F), battery life (about 3–5 / 4–6 years in cited AAA guidance), warning signs (clicking, dim lights, corrosion, age over three years) — AAA Club Alliance / AAA Northeast winter battery guidance: https://cluballiance.aaa.com/the-extra-mile/advice/car/will-your-car-battery-survive-winter ; https://magazine.northeast.aaa.com/daily/newsroom/aaa-offers-tips-to-avoid-getting-caught-with-a-dead-battery-this-winter/
- Resting-voltage state-of-charge scale (12.6V full, ~12.2V threshold), load-test principle (voltage should not collapse under load; ~9.6–9.7V minimum at 80°F in the cited FAQ), and “battery is the most common no-start cause” framing — battery FAQ and repair guidance cited in research: https://5series.net/forums/attachments/e60-discussion-2/142374d1375801279-i-committed-mortal-sin-i-bought-alternative-battery-car-battery-faq.pdf ; https://ricksfreeautorepairadvice.com/tag/dead-car-battery/
- Product specifications and maker ratings — Amazon listings linked in the picks box above (AstroAI AM33B B0CLV8R7QF; NOCO GENIUS10 B07W3QT226, list $124.95 at crawl; NOCO Boost GB70 B016UG6PWE, 2,000A, 8.0L gas / 6.0L diesel maker rating). Verify group size, CCA, and battery type for your vehicle before ordering any battery or accessory.
Voltages are approximate and temperature-dependent; prices and specs current as of October 2026 and vary by model and market — your owner’s manual and the battery label win any disagreement with this guide. This is the standard 12V battery only — never attempt DIY work on a hybrid/EV high-voltage (orange-cable) system.
Leave a Reply